Storage Entry Bench
Skill Level: Intermediate
Create a stylish storage bench to place your bags and shoes.

Easy to build, this project adds to the design and functionality of your entryway area. Store grab-and-go items in attractive wire baskets placed in the cubbies.
Project Completion Time: 3 hours plus drying time for wood finish.
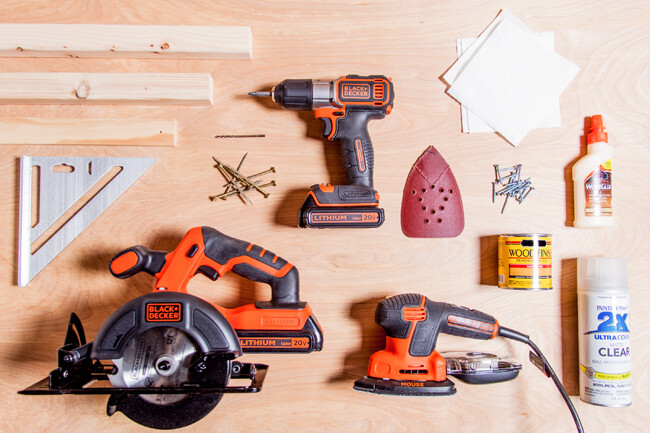
Thing’s You’ll Need

- 3/4 x 12” Glued Pine Board, 10’ Long
- BLACK+DECKER BDCDC18KB Drill/Driver
- BLACK+DECKER CS1004 Circular Saw
- BLACK+DECKER SRS480 Random Orbit Sander
- 7/64” Drill Bit
- 80- and 120-Grit Sandpaper
- (24) 1 1/2” No. 6 Wood Screws
- (16) 1/2” Wood Screws
- Straightedge or Carpenter's Square
- (4) 5 1/2” Coffee Table Legs
- (4) 2” Mounting Brackets for Legs
Step by Step Instructions
Step 1. Cut the Pine Boards
Cut the following pieces of 3/4 x 12” pine board with your BLACK+DECKER Circular Saw to assemble your entryway bench:
- (4) pieces, 11 13/16” long for the ends and cubby dividers.
- (2) pieces, 36” long for the bottom and seat of the bench.
Step 2. Attach the Ends to the Bench Bottom
Place two 11 13/16” end pieces underneath each end of the 36” bottom board and align all edges flush, creating right angles. With your BLACK+DECKER Drill/Driver, drill three evenly spaced pilot holes with a 7/64” drill bit to prevent splitting the wood when driving in screws. Drive three 1 1/2” screws through the bottom board and into each end piece.


Step 3. Attach Dividers to Create Cubbies
Measure and mark layout lines for the two dividers onto the bottom 36” piece, marking 11 3/4” in from both ends of the bottom piece to create three cubbies of equal width. Mark the same layout onto the bottom face of the seat board. Insert the dividers so that they’re perpendicular to the seat and bottom of the bench and aligned with the center of your penciled layout lines. Drill pilot holes before securing the divider with three 1 1/2” wood screws.
Step 4. Attach the Bench Seat
Flip over the bench assembly so the dividers and ends are pointing upward. Position the seat board on top so the dividers are on their layout lines and all edges are flush. Drill pilot holes and secure each divider and end with three 1 1/2” wood screws.
Tip: Depending on what type of screw you're using, pilot holes should be just slightly smaller than the screw. The idea is to allow the hole to be big enough for the screw to pass through without splitting the wood, but at the same time, small enough so that the threads grip firmly.


Step 5. Sand the Bench
Fill all visible screw holes with wood filler and a putty knife, and let the putty dry as directed. Sand all surfaces and edges smoothly with your BLACK+DECKER Orbit Sander and 80-grit sandpaper. Switch to 120-grit sandpaper and add a soft, rounded edge to the corners and sides of the seat. Wipe away all sanding dust with a clean rag.
Step 6. Finish the Bench and Feet
Brush on a coat of wood stain with a paintbrush and wipe off excess stain with a rag. Then apply stain to the wood parts of the four bench feet. Let the stain dry as directed by the manufacturer, then seal the bench and feet with a few coats of varnish. Let the final coat dry overnight.


Step 7. Install the Feet
Mark layout lines for the feet mounting plates, 1 1/2” from the outside edges of the bench bottom at each corner. Position the legs on the layout lines and fasten them with 1/2” screws.
Step 8. Style the Bench
Style the completed bench in your entryway with an accent pillow and decorative storage baskets to keep small items of your choice.